This is the fourth post in an ongoing series. This series, 'Process', focuses one-by-one on specific elements of how we make our beer. The first post on fermentation geometry can be found here. The second post on wild yeast wrangling can be found here. The third post on barrel work can be found here.
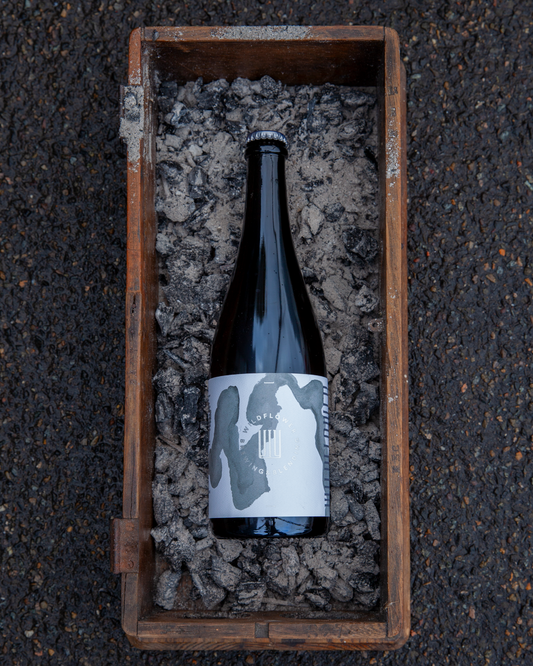
Photo courtesy of The Frankie Press for their new book, Look What We Made onsale here.
Intro
We blend, primarily, to create a level of consistency in our products all the while working within an inherently inconsistent, evolving process. It’s our last shot at our overarching goal of making balanced, nuanced beer rather than dominant, single noted beverages. Blending is arguably the most important step of what we do at Wildflower. It vastly separates our beer from a process perspective, yet more important to us, for its palate presentation.
We are often asked how we do it or what we are looking for. Its not an easy question to answer in person, and doing it in writing has proved to be equally difficult. In this next post in our series process, I will outline a method I believe can be successful and over time possibly useful to others who are looking to blend their beer.
Like I have said in other posts, the process below is an example of what is working for us right now. It is not by any means a definitive method nor suited for everyone’s personal preferences. As a blended beer can be a representation of the blender’s preferences, our process may not work for all.
Setup
Disruptions while you are blending, we feel, can negatively impact your final blend. So, before we really start, we try to clear our list of jobs that day. We tidy the space and pretty much do our best to set our focus squarely on the barrels at hand. Generally, we will blend around the mid-morning and into lunch. This is when your palate is most sensitive and awake. So it is good to have had a moderately substantial breakfast and if you had a coffee, give yourself a couple of hours afterward until you start.
Our setup begins with picking out the barrels that we will sample on the day. We wash enough glassware to have on for each sample and mark glasses with a paint pen for each barrel number. As the samples we are taking are generally quite small in volume, clean and odourless glassware is important.
We usually also have some sort of cracker or bread to eat while we blend to help is get through the 60 or so samples we taste without our palates getting too fatigued. If we have time, I’ll pick up some cheese that will pair well with the beer we are blending. We think 18mo Compte is an excellent match with Gold and a semi-firm Spanish goat cheese does the trick with the Amber.
Lastly, bring a jug of water to your blending table and something to take notes with and on.
Tasting/notes
As soon as you pull a sample, it will start to oxidise. This reaction happens quite quickly and changes the true aromatics of the beer. In order to minimise this, we taste and asses each glass directly after pulling them. You can also pull your sample and cover the glass to sample it later. We have done both, but prefer to taste as we pull now.
When we taste each sample, we generally asses them on three things. Firstly, the initial aroma. I like to get a quick judgement on whether or not I find it to be attractive. We note this down next to the barrel number with a quick +, 0 or - sign.
Secondly, we taste. This is the real crux of this post and the crux of tasting… for us is discerning and identifying palate structure, i.e. where does the beer sit. This I think is the most difficult part, as well as the thing that sets apart our blends from others. Some people blend based on aroma of flavour, and pick out matching characteristics from one sample or another to blend together. This certainly works for some, however the end goal in our beer is balance. We are looking for a full palate experience and a length in our beers that is best achieved when understanding palate placement.
So when we take a sip, we are looking at where acidity or bitterness finishes the beer. Is its flavour more up front, or is there an old-oak length that draws out the flavour of the beer. We note these things down, about whether it is more up front, in the middle or at the back and then use this later when building a blend. Obviously, but sometimes less importantly for us we will also be at this time noting the various flavours of the sample. These notes prove helpful when selecting between barrels.
Lastly, we will simply decide yes or no if the barrel is ready to blend. At times, a barrel could be tasting great, with a good aroma but we feel it could be better if we leave it to sit. Most of the time; however, an unselected keg just hasn't reached its maturity. By sampling the entirety of our cellar on a monthly basis, our attempt is to catch each and every barrel when it is at its peak… instead of leaving them for a prescribed amount of time. We are not concerned with their age in barrel, rather their readiness to be in a blend.
Benchtop blends
Once we have tasted everything we are set to taste on the day, we will pull out the samples of the barrels we have deemed ready. Generally, throughout tasting there is a barrel or two that stand out and we decide to work with. We look back at our notes and find those barrel’s structure… again, recall where they sit in your palate. From here, we will start to figure out the shape of the blend and its volume. We start to think about what the pre-selected barrels need… length, acidity, bitterness and where those flavours sit.
The next part is the hard part to describe. From here, I wont call it trial and error because you get better at it. However from here Luke and I talk about and make small-scale variations of the selected barrels to find the best combination. This is where understanding palate I believe helps the most. We tend to select the most structural bench top blends, the ones that distinctly exhibit primary, secondary and tertiary flavours.
For making these small blends, we use a volumetric glass syringe to pull measured amounts of each barrel sample into a separate glass. Depending on the total volume of the blend and the size of each barrel, you can work out the percentage of the total blend each barrel will be and proportionally scale that down into your glass.
A few things to keep in mind with bench top blends. Firstly, make sure to label as you go. You would be surprised how easy it becomes to get glasses mixed up. Secondly, if a lot of time has past since pulling the sample, it is probably best to re-sample the barrels so you are not getting poor representations of the blend. Third, remember that these beers will undergo a refermentation and will be enjoyed cold, with carbonation. The cellar-temp, still beer on the bench may not always be the best after bottle conditioning. Simply a thing to come in mind, especially when it comes to acidity as carbonation emphasises this.
Closing thoughts
Once you have your blend locked in, its just up to you to package it. Packaging and bottle conditioning has merit to be its own post. We allow our blends to condition in bottle for around 12 weeks before release. A blended beer needs time in bottle to integrate, for the individual flavours of the components to meld into a uniform voice.
Testing and expanding my palate have been some of the most helpful things for me in becoming a better blender, well outside of repetition. Some ways to train your palate include certified training programs such as the BJCP, Cicerone or Sommelier courses. Also, in being open to new flavour experiences in food and drink. When you are discerning what you consume, each new flavour can be logged into your flavour memory for later reference. I think about it like the old-style library cards. Grandma’s cherry pie is in one shelf along with cooked apples and other baked fruits while preserve lemon acidity sit next to lazer-like Riesling acid. The more cards you log into that system, the more descriptive you can be, and the more often you access that library the quicker you can be.
_______
As always, please feel free to send any questions to us at info@wildflowerbeer.com on barrel work.
best,
topher